使用 C/C++ SDK 開發 Raspberry pi Pico 程式,編譯完成後產生 UF2 檔案。然後將這個檔案複製到 Pico 開發板上完成燒錄動作,就如同 Pi Pico 官方網站的示範展示 (https://www.raspberrypi.com/documentation/microcontrollers/c_sdk.html#your-first-binaries )。但若是頻繁修改的狀態下,這樣的操作方式就有點不方便使用了。
Pi Pico 還有如同其他 ARM 平台一樣有 SWD Debug port, 所以可以走這個路徑做板子燒錄及進行程式除錯。
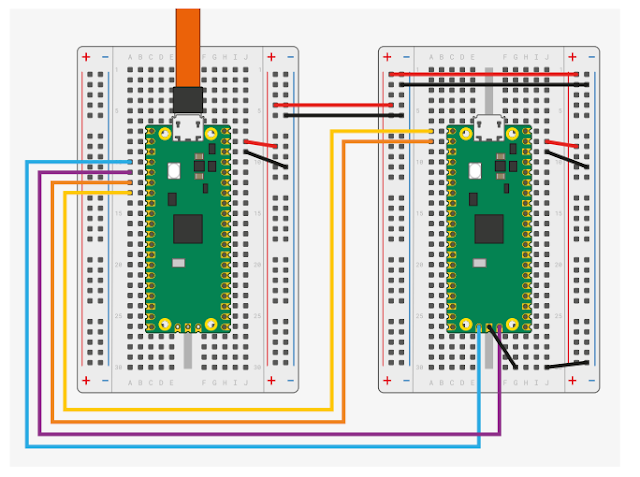
在官方文件 (https://datasheets.raspberrypi.com/pico/getting-started-with-pico.pdf ) 的 58 頁 (Appendix A: Using Picoprobe ) 及 62 頁msys, 說明了透過另一個 Pico 板 做為 Probe Debug 功能,及接線方法。
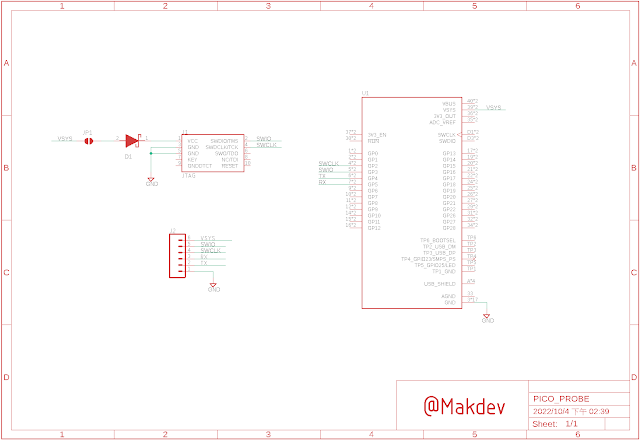
Debug Probe 電路
J1 是 標準的 10 pin JTAG 連接器,預留。
J2 連接至 Pi Pico 的 SWD CLK 及 SWIO,如果需要有 printf 功能, 則分別接入 TX , RX。VSYS 可不用接,Target 的 Pi Pico 獨立接入 USB 做為電源輸入。
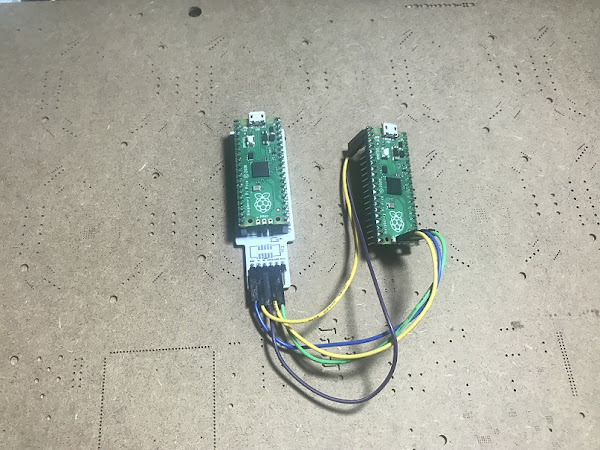
實物連接
Demo 影片
原始電路圖 及 Gerber
https://github.com/cold63/Pico_C_Project/tree/main/Debug_Probe


